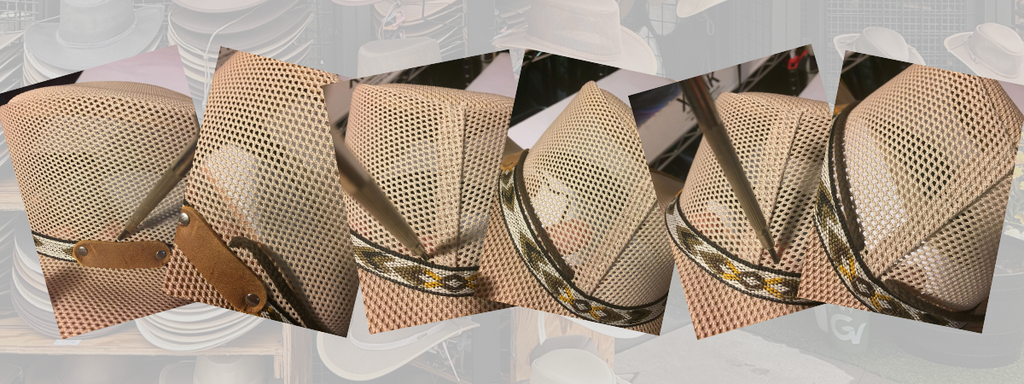
We’re excited to share a handy guide on how to attach a strap to your mesh/nylon hat. Whether you’re customizing your look or adding functionality for outdoor adventures, this step-by-step hat tip will help you get it right.
What You’ll Need
-
Mesh/Nylon Hat: The base of your custom design.
-
Hat Strap: Choose a strap that complements your style and fits your needs.
-
Attachment Hardware: Depending on your design, you might need snaps, buckles, or adjustable clips.
-
Basic Tools: Small screwdriver, scissors, or any additional tools required by your chosen hardware.
-
Measuring Tape: For proper positioning and adjustment.
Step-by-Step Instructions
1. Plan Your Design
Before you start, decide on the placement of your strap. Do you want it attached on the side for a sporty look, or at the back for a classic vibe? Sketch a quick layout or mark the positions lightly with chalk on your hat.
2. Prepare the Hat
If your hat has seams or designated attachment points, you’ll need to ensure these areas are clean and accessible. For mesh or nylon materials, gently press the fabric to remove any wrinkles. This ensures a smooth application of the strap.
3. Attach the Hardware
If your strap includes hardware like snaps or clips:
-
Mark the Spots: Use your measuring tape to mark where the hardware will be placed.
-
Secure the Hardware: Carefully sew or attach the hardware to the hat. For added durability, double-stitch or use fabric adhesive where necessary.
-
Test the Fit: Before permanently securing everything, test how the strap sits on your hat. Adjust the placement if needed.
4. Attach the Strap
With the hardware in place, connect the strap:
-
Insert and Secure: Slide the strap into the hardware or secure it with the buckle/clips.
-
Adjust for Comfort: Ensure the strap lies flat and adjust its length if possible. The strap should be snug but comfortable, giving you the freedom to move without worry.
5. Final Inspection
After attaching the strap, take a moment to inspect your work:
-
Check Alignment: Ensure the strap is evenly placed and symmetric.
-
Test Durability: Gently tug on the strap to confirm that the attachment is secure.
-
Make Adjustments: If necessary, reinforce any weak points with extra stitching or adhesive.
Tips and Tricks
-
Practice First: If this is your first time customizing your hat, practice on a spare piece of mesh/nylon fabric before working on your favorite hat.
-
Choose Quality Materials: Durable hardware and quality straps can make a huge difference in longevity, especially for outdoor use.
-
Keep It Simple: Sometimes, less is more. A simple design not only looks cleaner but also reduces the risk of wear and tear.
Share Your Custom Creations!
We’d love to see how you’ve customized your Walkabout hat. Share your photos and tag us on social media using #WalkaboutStyle or visit our site for more tips and tricks.
Happy crafting, and thank you for being part of the Walkabout community!
For more creative DIY projects, visit our website at www.walkabout.com.

